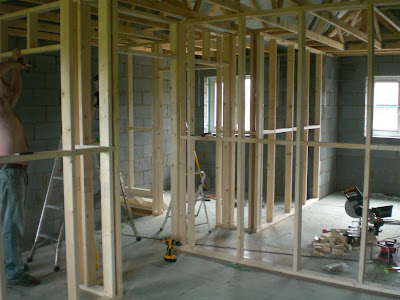
This weekend has been so wet that we decided to make a start on first fix electrics and finish off the studwork, which allowed us to work inside.
Most of the electrics will be run in the first floor void (between the floor joists). The only electrics above the first floor ceiling are the upstairs lighting circuits, so this was pretty quick to get done. It's very easy to drill holes in the studwork and feed the wires through, clipping as you go. Soon we'll board out the studwork, but probably won't cut the holes for sockets and switches until the whole lot is plastered. This makes the plastering much easier and neater, but does mean we'll have to remember where all the wires run so that we can cut the holes in the right places!
Below, this is most of the lighting circuit done for the kitchen. The twists of cable are to allow some slack in the lighting string so that we can cut and wire the downlights in the right place after the ceiling has been plastered. We intend to use Philips 7watt LED downlights which will cost £450 approx for the whole kitchen/diner. These are equivalent brightness to an 11w energy saving unit, but with equivalent light quality of a 50watt halogen, however the electricity you save using LEDs should pay for the units in about a year. Halogens tend to blow frequently and are fairly expensive to replace, where LED bulbs should last around 50,000 hours (years)!
The kitchen lighting will be split into three separate zones - 9 downlights over the cooking area, 4 downlights over the dining area, and 4 under-cabinet LED strips to light the worktop areas. Looks like this kitchen will be lit up like a bloody Christmas tree!
The work is being overseen by our sparky. We're doing all we can to make his life easier, labelling everything up as we go.
On all the block walls we'll be dry lining the plasterboard using dot-dab adhesive so there'll be a small void behind the plasterboard. This means there's no need to chase the cables into the walls, saving lots of time and effort. We'll just need to cover the wires with pvc capping before boarding out. Similarly the socket and switch boxes won't need to be chased in either. A 10mm adhesive void, 12.5mm plasterboard, and 3mm skim just about accommodates the 25mm boxes.


Well done guys! Looks like a proper house. You should be proud of yourselves... and I'm sure you are!
ReplyDelete