Sunday, 24 July 2011

Week 21 - Finishing first fix electrics


This week we continued with the task of running wires and cables through the house. Certain areas of the 1st floor void are now pretty congested - it's unbelievable how many hundreds of metres of wire are required in a house.
Below, wires for the boiler are left coiled up until the boiler is fitted in position.


Below, the most congested area next to the consumer unit (fuse box). There will be a cupboard in this corner to house the consumer unit and other things like phone and internet connection and the alarm control unit, so this corner has loads of data cables leading to it as well as the electrics.


200m 1.5mm two-core and earth (lighting)
200m 2.5mm two-core and earth (sockets)
100m 2.5mm three-core and earth (switches, thermostats and smoke alarms)
25m 6mm two-core and earth (oven)
100m Cat 5 data cables (internet/networking)
100m 6-core alarm cable
50m phone line


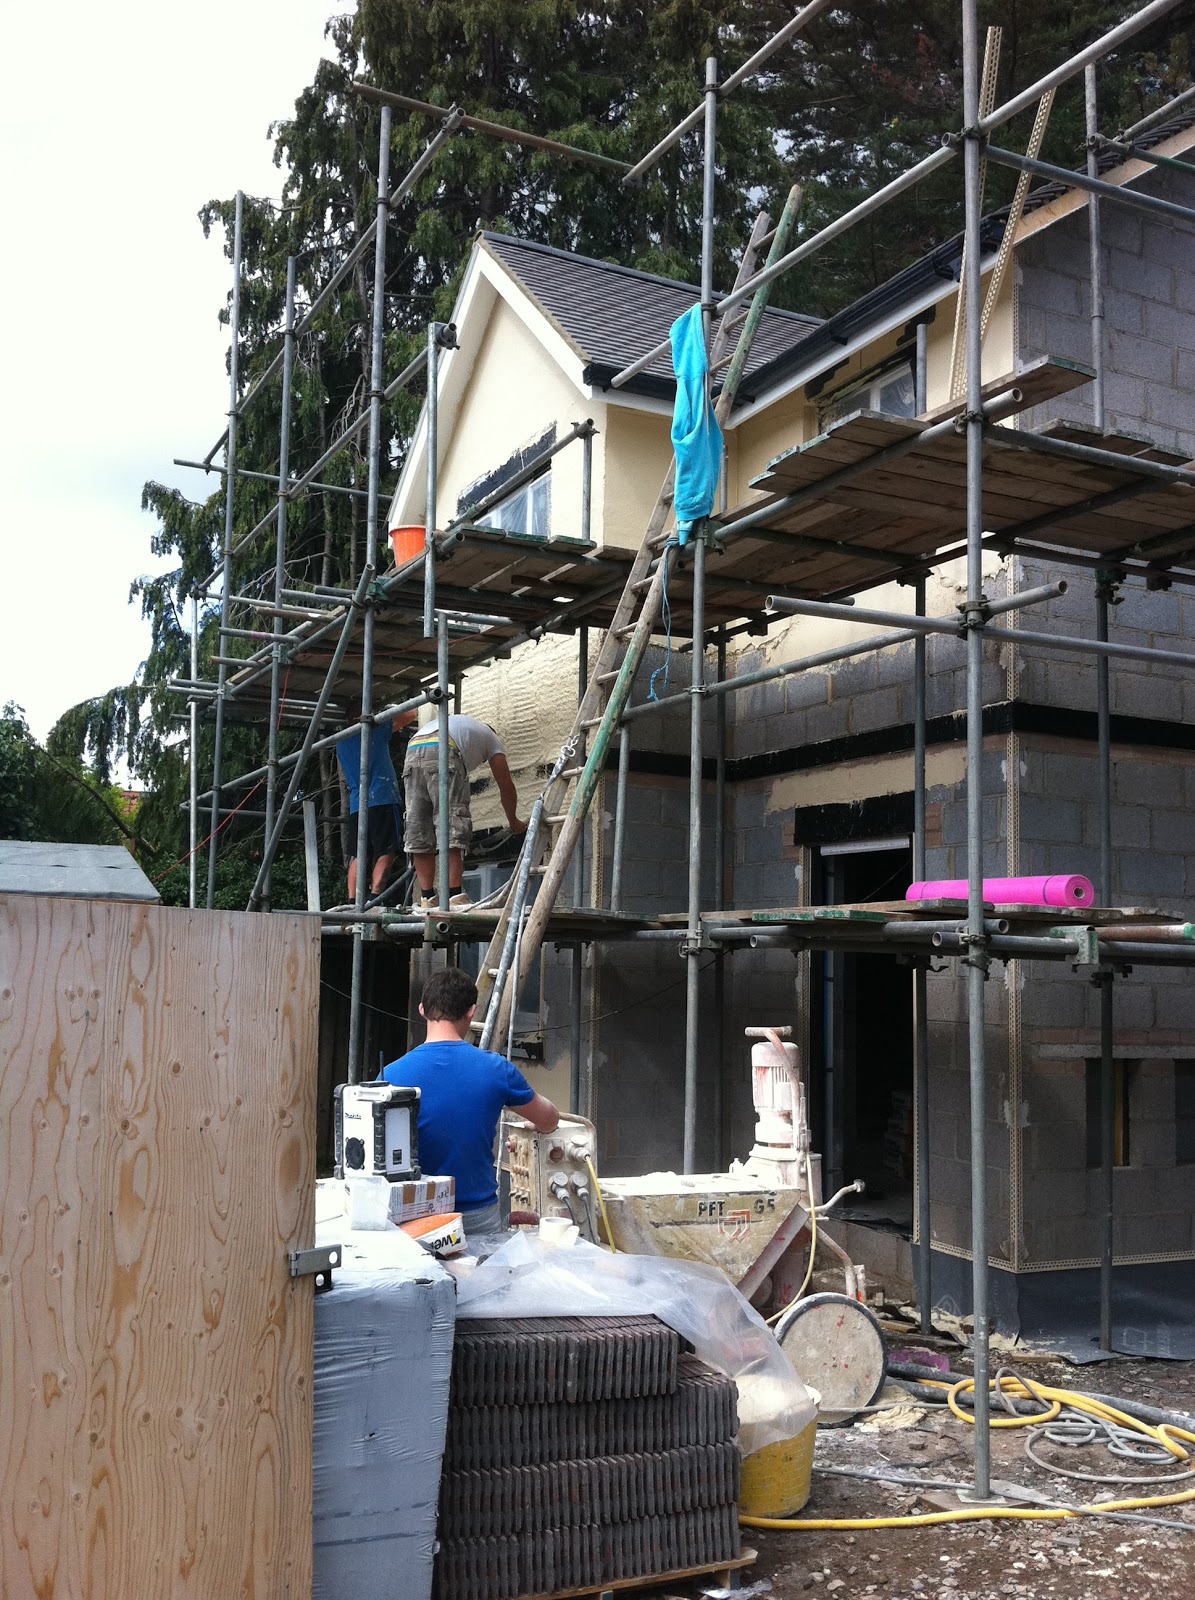
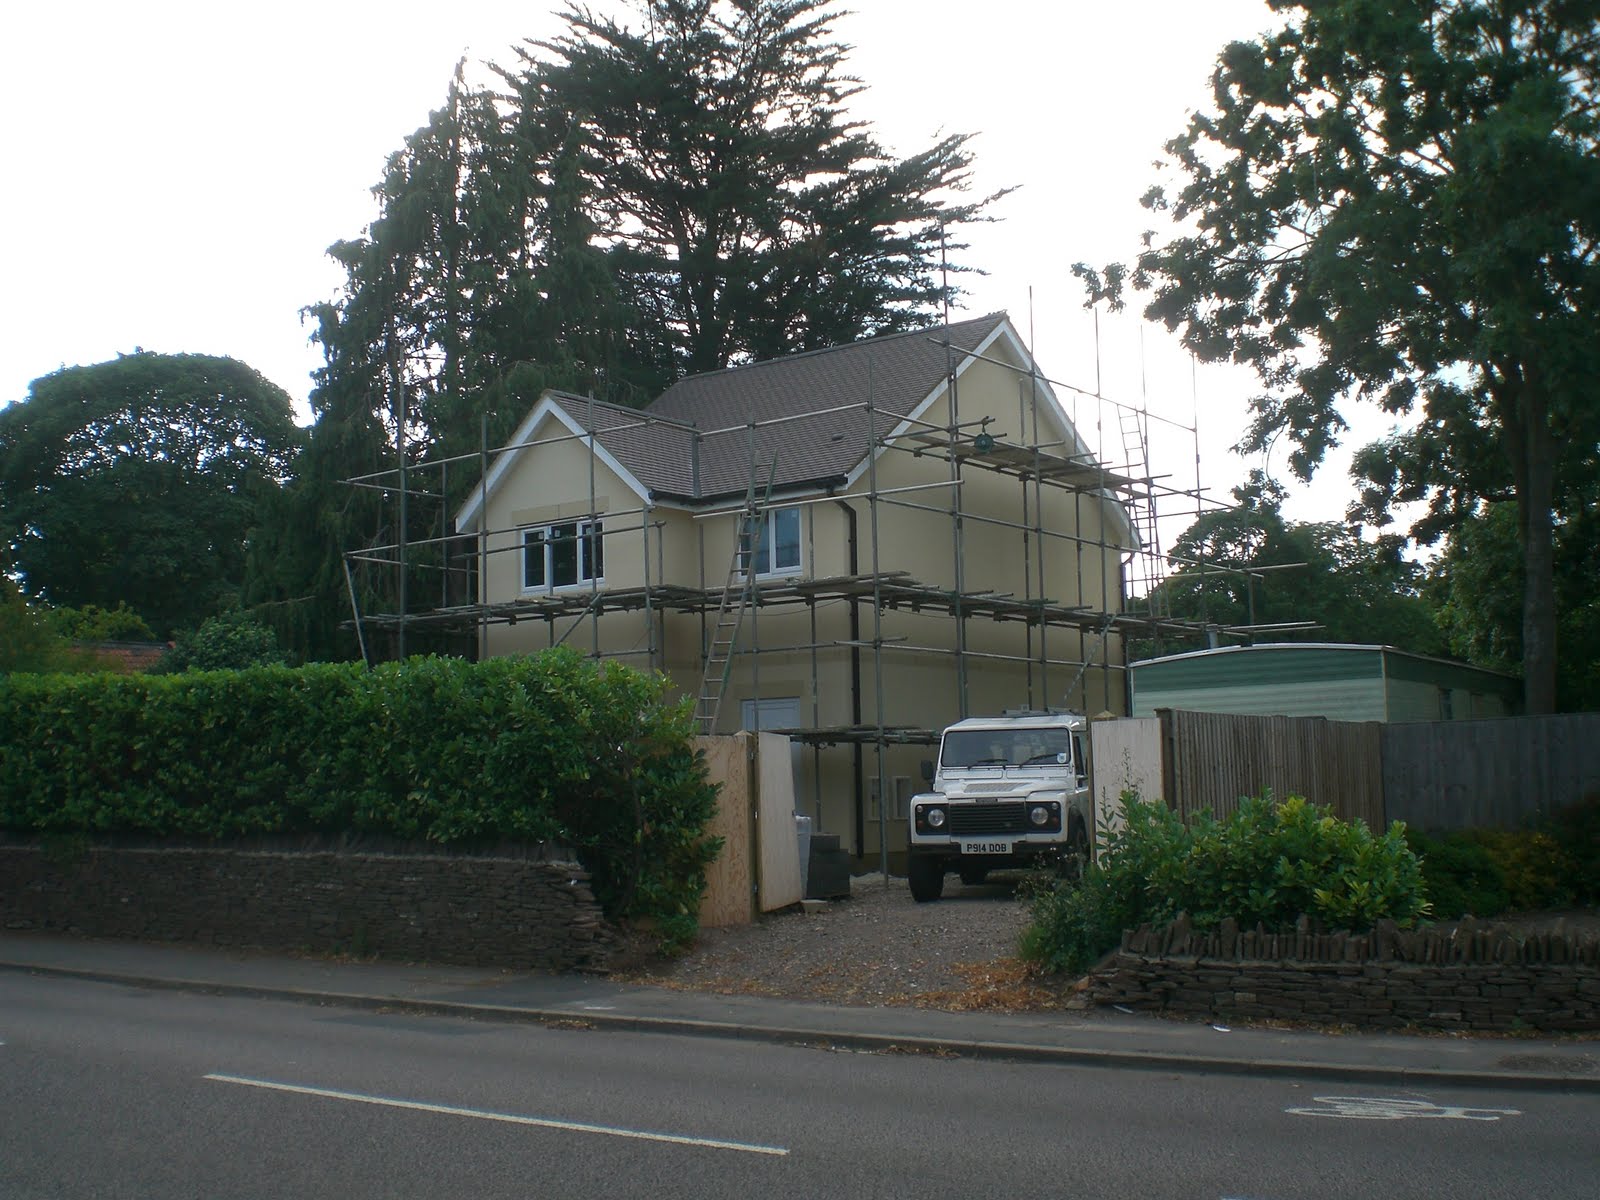
The weather has been a lot better this weekend so fortunately we finally managed to finish off a few external snags before the scaffolding gets taken down in a few days - we've come to the end of the 10-week contract. Kai pointed the joints between the decorative stone pieces using a special bath-stone coloured mortar, although we're not convinced yet if it actually matches. We'll give it some time...


Below, the valley tiles are finally mortared in. It was a complete nightmare to do this job as the angle of the roof is slightly too steep to comfortably climb up without slipping. The edge tiles are also extremely delicate and break very easily, so we ended up placing a scaffolding board (plank of wood) either side of the valley to kneel on and spread the load - one person climbing up to apply the mortar, and the other keeping hold of the bottom of the boards to stop them sliding. I'm pretty sure this job would be a lot easier if sky-hooks had been invented.

Sunday, 17 July 2011

Week 20 - Starting first fix electrics

This weekend has been so wet that we decided to make a start on first fix electrics and finish off the studwork, which allowed us to work inside.


Most of the electrics will be run in the first floor void (between the floor joists). The only electrics above the first floor ceiling are the upstairs lighting circuits, so this was pretty quick to get done. It's very easy to drill holes in the studwork and feed the wires through, clipping as you go. Soon we'll board out the studwork, but probably won't cut the holes for sockets and switches until the whole lot is plastered. This makes the plastering much easier and neater, but does mean we'll have to remember where all the wires run so that we can cut the holes in the right places!


Below, this is most of the lighting circuit done for the kitchen. The twists of cable are to allow some slack in the lighting string so that we can cut and wire the downlights in the right place after the ceiling has been plastered. We intend to use Philips 7watt LED downlights which will cost £450 approx for the whole kitchen/diner. These are equivalent brightness to an 11w energy saving unit, but with equivalent light quality of a 50watt halogen, however the electricity you save using LEDs should pay for the units in about a year. Halogens tend to blow frequently and are fairly expensive to replace, where LED bulbs should last around 50,000 hours (years)!


The kitchen lighting will be split into three separate zones - 9 downlights over the cooking area, 4 downlights over the dining area, and 4 under-cabinet LED strips to light the worktop areas. Looks like this kitchen will be lit up like a bloody Christmas tree!


 The work is being overseen by our sparky. We're doing all we can to make his life easier, labelling everything up as we go.
On all the block walls we'll be dry lining the plasterboard using dot-dab adhesive so there'll be a small void behind the plasterboard. This means there's no need to chase the cables into the walls, saving lots of time and effort. We'll just need to cover the wires with pvc capping before boarding out. Similarly the socket and switch boxes won't need to be chased in either. A 10mm adhesive void, 12.5mm plasterboard, and 3mm skim just about accommodates the 25mm boxes.

Sunday, 10 July 2011

Weeks 18 and 19 - Render and plastics

Right, what a busy couple of weeks! Sorry for the delayed blog post.
The last piece to achieve wind and watertight - the front door has been installed so the house is now secure. 


 uPVC fascias, soffits and barge boards all done. These have to be fixed in position before rendering.


Kai mortaring in all the verge. This stops the wind from lifting the edge tiles and the driving raining from getting into the roof void.


Fitting the guttering. I chose ogee style over round or square - it is about one and a half times the price, but it's really posh...


The renderers prepared the house ready to render the next day. The beading strips are fitted to all the corners to form a proper edge, which makes a really neat corner when it's all rendered.

 
160 x 25kg bags of 'Weber,pral M' Ivory mix render - 4 tons in all. This is a one-coat through-coloured monocouche render, which out-performs traditional sand and cement renders, and shouldn't need painting for 10-15 years. The powder gets poured into a machine which adds water and squirts the sloppy mix out of the end of a hose. The team of renderers on the end of it have to work quickly to get a consistent thickness and smooth it back to a nice finish.


It took the team of 5 just one day to render the whole house. About 4 hours of squirting, followed by a 2 hour lunch break to allow it to dry a bit, then 2 hours of rubbing it back.
These guys normally work on big commercial developments (like Bristol harbourside flats) - not quite sure how we persuaded them to do our little house but I guess sometimes it's just nice to do a one-off. They were recommended by Bob the Builder. Because they work so quickly, they cost the same as if it was hand-applied, which would take a week and a half - but the quality of finish is much better because it's all applied so quickly (no drying lines, and it's applied at high pressure which helps it key  into the concrete blocks really well).
The roll of pink on the scaffolding is a special plastic mesh which they apply to areas like over windows and door heads, where the patch of render will be fairly small and needs the added mesh reinforcement to stop it cracking.


The render is still quite wet at this stage and looks quite dark. As it dries it will lighten up, and should contrast nicely with the decorative stonework around the windows.


In the meantime, Kai is going great guns with the studwork upstairs. It feels strange now that the space has been divided up into rooms.


The outside finished, and a new addition to the plot - Dobby the landrover, which should come in useful...

Sunday, 26 June 2011

Week 17 - More roof tiling

Sunday - a very hot day for roofing! After finishing off all the valleys it was time to get the ridge tiles all in place.  We're using a dry ridge system instead of bedding all the ridge tiles in with mortar, it is simpler and neater to install but more importantly it vents the roof space and allows you to meet the building regs with a lower spec roofing felt which is significantly cheaper. The product didn't really do a grat job of joining the ridge tiles together and required a fair bit of fettling to get it looking right. Below, Kai sticking the ridge felt to the top tiles.


The ridge tiles in place on the projecting roof. It looks really neat and should look even better once all the verges are grouted in.


The finished roof - view from the field:


 And view from the road:


We have quite a lot of tiles left over because the supplier delivered half a pallet too many. We have a small projecting roof over the front door to build and tile, and then the spares will have to be sent back...

We'll be glad if we never have to see a tile ever again, in all it's taken 4 long days to tile the roof spread over a couple of weeks and we've been hampered a bit by the weather. It's the sort of monotonous job that is best done quickly with 3-4 people, that way you can have a couple on the roof and a couple on the scaffolding which saves all the moving around up there.

Sunday, 19 June 2011

Week 16 - Roof tiling and windows

A huge thanks to Colin, who was back to help out on Monday and Tuesday. After finishing off battening the front of the roof, Monday's job was to 'bump' the stacks of tiles up onto the scaffolding and distribute the piles across the roof. We hired a 'Bumpa Hoist' which is a nifty conveyor belt for tiles. Colin loading at the bottom and Kai unloading at the top. The machine has three settings - fast, very fast, or aaaaaarrrgggghhhhh! Colin showed no mercy loading the bottom, leaving Kai running around the roof whilst the machine spat tiles off the end of the belt. Needless to say at the end of the day Kai was 'beat'.

We had seven pallets of tiles in total. Each pallet is nearly a tonne, and Colin+Kai took thirty minutes to get each pallet up there.


Below, the tiles all bumped. This helps to get the roof to settle under the load. If you start laying tiles while the roof is not equally loaded, it might all go a funny shape...


Starting to lay the tiles. Not all of them have to be nailed - just every fifth row, and the the edge tiles. We're choosing to nail all the edge tiles and one adjacent for peace of mind. That's only about two thousand nails...


Put to the test!


The valley areas are annoying to say the least. It slows you down to about half the speed, having to mark out and cut each valley tile. You have to be quite accurate getting the cut at the correct angle, otherwise it looks rubbish from a distance.


There were heavy showers on Saturday so Kai worked inside fitting the windows. It wasn't long ago we were doing the same thing whilst renovating a Victorian terraced house - and boy that was a lot harder. Newbuild = straight lines, right angles, precise measurements, secure fixings. Five windows and one set of French doors took Kai about 6 hours to fit and glaze.


It's a lot quieter inside the house now that the windows are in, they block out most of the road noise from the front.


Much better weather on Sunday so it was back to laying roof tiles. One or two more good days next week should complete the tiling, but there are an awful lot of small finishing details to be done - grouting edges, soffits and fascia boards, rainwater goods....


Sunday, 12 June 2011

Week 15 - Roof felting and battening

We spent Thursday and Friday finishing off the gables, cutting blocks to fit the angle of the roof took ages. Many thanks to Steve for coming to help out! 


The finished gable ends look really neat now. The white plastic stuff in the cavity is called a fire sock, it's filled with mineral wool and designed to stop fire spreading into the roof space.


After working out what spacing is required for the tiles, we started felting and battening. Battens are required at 100mm centres for plain tiles (a bit like slates) which means an awful lot of nails and hammering, and aching hands for Kai at the end of it... Next time we'd go for large format interlocking tiles which cover a lot more area and need a lot less battening! They wouldn't look nearly as nice as plain tiles will though.


One side all finished, ready to get loaded up with tiles.


The windows arrived on Friday morning, and we had just enough time to fix and glaze the big French doors which will lead from the kitchen out to the decking.


Sunday, 5 June 2011

Week 14 - Roof structure

This week the trusses arrived, so we spent Saturday getting the roof structure up and braced. A huge thanks to Kai's dad, Colin, for helping out. It was a mammoth task getting the trusses up onto the roof by hand! Like the floor joists, they are incredibly floppy individually, and getting the temporary bracing fixed was very difficult to do safely. The roof gets much more rigid as you add in the permanent bracing, and in the end it feels nice and secure to walk around up there.


We spent quite a long time making sure the trusses all lined up in every plane, so that the tiled roof will look flat from whichever angle you look at it. It was especially tricky getting the projecting roof to meet the main roof,getting the valleys and the ridge to all line up. Any mistakes here will show up really badly once the battens are on, and would be a lot of work to rectify. It's all too easy to rush it, but it's worth taking the time to get it perfect.


It looks like a proper house now!


 With the cavity closers in position the windows look a lot tidier. The windows and doors will arrive next Friday, and shouldn't take more than a day to fit.


Couldn't do much on Sunday due to the inclement weather, but Kai managed to get the felt support trays and over-fascia vents in on the rear of the roof. Ten years ago plastic products like cavity closers and roof accessories weren't commonly available, and you would have had to make do with bits of timber. The plastics are cheap, very quick and easy to put in, and finish off the edge detail very neatly.