Monday, 29 August 2011

Week 26 - Even more boarding out

Only managed to put in one full day's work this week so not much progress. Having finished the downstairs ceilings we went on to dot-dab the walls of the living room and most of the hallway.


The first window board (cill) has been fitted and looks really nice. The window reveals will be left till last along with lots of other annoying details. We're about three-quarters of the way through boarding out now, with one week left to go to get everything ready before the plasterers come in.
This particular task is getting a big monotonous now, it'll be good to get it out of the way... With nearly two tons of plasterboard stuck on the walls with 1.2tons of adhesive, we think it would be sensible to pay someone to do this next time!

Sunday, 21 August 2011

Week 25 - More boarding out

This week we couldn't put off getting messy any longer and started dot-dabbing the plasterboard onto the block walls. The changes to the recent building regs make this task a bit harder than it used to be as you now have to pass an air tightness test which means dabs of adhesive aren't allowed, you need a continuous line of adhesive along the tops, bottoms and corners of every wall to form a seal. Special attention must also be paid to the reveals on every window.


We have a rather unconventional way of applying the adhesive, most professionals would dab it onto the wall but we find it easier to dab it onto the board flat on the floor then lift into place, being careful not to break the now heavy board. I guess it's OK to find what works best for you, I will learn to do it properly one day.
 

The rooms are starting to look much neater with the blockwork covered up. The wires for sockets and lights are just poked through small holes for the moment - after plastering the boxes will be cut in.


The boards are pressed into place by striking with a straight edge alternating between the vertical and horizontal direction, this makes sure the board squashes onto the wall evenly. It requires a fair bit of checking with a level and ensuring that it's in line with adjacent boards. It's all quite hard on the hands!


The upstairs is almost all boarded out now so we've moved onto the downstairs ceiling. The boards require acoustic quilt on top of them which is a nasty job with all the dust and fibres getting everywhere.


We mounted a bit of chipboard on the wall ready for the consumer unit to fix to, it keeps the wires nicely clipped till we are ready to connect everything. The new gas line is all soldered up and ready to connect to the meter when they install that in a few weeks.


Sunday, 14 August 2011

Weeks 23 and 24 - Scaffolding down and starting to board out

Progress over the last couple of weeks has been a bit slow due to the jobs being fairly bitty. Kai took the scaffolding down himself as the scaffolders aren't in any rush to come and collect it! We need the space for a skip to be delivered this week, and so that the delivery truck could get in to drop off all the plasterboard and dot-dab adhesive for the stud walls. The scaffolding is currently all stacked in a massive pile on the ground. The house looks great without the scaffolding hiding it, we're really happy with the way it looks.


The plasterboard sheets are 2.4m x 1.2m - pretty heavy and unwealdy so we used props to hold them in position while fixing them to the ceiling.


We boarded out one side of the stud walls, and packed the cavity with acoustic blanket which is a building regulations requirement to reduce noise coming through the walls between habitable rooms.


Kai fitted the waste pipes for the bathrooms in position under the floor, and laid the gas pipe ready for the plumber to connect up.


Monday, 1 August 2011

Week 22 - Starting first fix plumbing, and stairs

This week's job was getting most of the first fix plumbing done - running central heating and water pipes through the first floor void and up or down the walls as required. The ends of the pipes are all temporarily capped so that the system can be pressure tested. For the main system, we're using push-fit plastics called SpeedFit which are guaranteed for 25years. The pipes running the first couple of metres from the boiler will need to be done in copper though, to allow the high temperatures from the boiler  to dissipate a little. Our last place was plumbed in polyfit which is an inferior brand, speedfit is so much easier to use with neat little features like insertion marks on the pipe so you know when it's fully home in the fitting. Running the flexible pipe through the joists is simple compared with trying to feed sections of copper through and soldering each joint.


Below, the wall has been chased out to allow pipes to be recessed. These will sit behind the dot dab plasterboard.


Kai even managed to get the soil pipes all sorted in the time it took me to have a shower... (athough maybe this says more about how long I take in the shower?!)
We're trying to be clever and hide all the services in the floors so you don't get boxed in pipes everywhere but it does cause some headaches deciding in advance where pipes should poke through the floors and walls. It has forced us to finally decide what layout we are having and which suite we are going for in order to get the measurements correct.


The staircase was delivered on Friday afternoon so we spent the evening putting the last pieces together and getting it fixed into position. Finally we can get upstairs in a civilised manner! The straight flight came pre-assembled, just requiring the 3 winder steps and newel posts fitting into position with wedges, dowels and plenty of wood glue. The stairs were cut on a CNC router so everything fitted perfectly, with less than 10mm to spare in our stairwell, I love precision!


We'll leave the ballustrading off until the house is in a more finished state - don't want the messy plasterers getting our handrail all mucky.


Sunday, 24 July 2011

Week 21 - Finishing first fix electrics


This week we continued with the task of running wires and cables through the house. Certain areas of the 1st floor void are now pretty congested - it's unbelievable how many hundreds of metres of wire are required in a house.
Below, wires for the boiler are left coiled up until the boiler is fitted in position.


Below, the most congested area next to the consumer unit (fuse box). There will be a cupboard in this corner to house the consumer unit and other things like phone and internet connection and the alarm control unit, so this corner has loads of data cables leading to it as well as the electrics.


200m 1.5mm two-core and earth (lighting)
200m 2.5mm two-core and earth (sockets)
100m 2.5mm three-core and earth (switches, thermostats and smoke alarms)
25m 6mm two-core and earth (oven)
100m Cat 5 data cables (internet/networking)
100m 6-core alarm cable
50m phone line


The weather has been a lot better this weekend so fortunately we finally managed to finish off a few external snags before the scaffolding gets taken down in a few days - we've come to the end of the 10-week contract. Kai pointed the joints between the decorative stone pieces using a special bath-stone coloured mortar, although we're not convinced yet if it actually matches. We'll give it some time...


Below, the valley tiles are finally mortared in. It was a complete nightmare to do this job as the angle of the roof is slightly too steep to comfortably climb up without slipping. The edge tiles are also extremely delicate and break very easily, so we ended up placing a scaffolding board (plank of wood) either side of the valley to kneel on and spread the load - one person climbing up to apply the mortar, and the other keeping hold of the bottom of the boards to stop them sliding. I'm pretty sure this job would be a lot easier if sky-hooks had been invented.

Sunday, 17 July 2011

Week 20 - Starting first fix electrics

This weekend has been so wet that we decided to make a start on first fix electrics and finish off the studwork, which allowed us to work inside.


Most of the electrics will be run in the first floor void (between the floor joists). The only electrics above the first floor ceiling are the upstairs lighting circuits, so this was pretty quick to get done. It's very easy to drill holes in the studwork and feed the wires through, clipping as you go. Soon we'll board out the studwork, but probably won't cut the holes for sockets and switches until the whole lot is plastered. This makes the plastering much easier and neater, but does mean we'll have to remember where all the wires run so that we can cut the holes in the right places!


Below, this is most of the lighting circuit done for the kitchen. The twists of cable are to allow some slack in the lighting string so that we can cut and wire the downlights in the right place after the ceiling has been plastered. We intend to use Philips 7watt LED downlights which will cost £450 approx for the whole kitchen/diner. These are equivalent brightness to an 11w energy saving unit, but with equivalent light quality of a 50watt halogen, however the electricity you save using LEDs should pay for the units in about a year. Halogens tend to blow frequently and are fairly expensive to replace, where LED bulbs should last around 50,000 hours (years)!


The kitchen lighting will be split into three separate zones - 9 downlights over the cooking area, 4 downlights over the dining area, and 4 under-cabinet LED strips to light the worktop areas. Looks like this kitchen will be lit up like a bloody Christmas tree!


 The work is being overseen by our sparky. We're doing all we can to make his life easier, labelling everything up as we go.
On all the block walls we'll be dry lining the plasterboard using dot-dab adhesive so there'll be a small void behind the plasterboard. This means there's no need to chase the cables into the walls, saving lots of time and effort. We'll just need to cover the wires with pvc capping before boarding out. Similarly the socket and switch boxes won't need to be chased in either. A 10mm adhesive void, 12.5mm plasterboard, and 3mm skim just about accommodates the 25mm boxes.

Sunday, 10 July 2011

Weeks 18 and 19 - Render and plastics

Right, what a busy couple of weeks! Sorry for the delayed blog post.
The last piece to achieve wind and watertight - the front door has been installed so the house is now secure. 


 uPVC fascias, soffits and barge boards all done. These have to be fixed in position before rendering.


Kai mortaring in all the verge. This stops the wind from lifting the edge tiles and the driving raining from getting into the roof void.


Fitting the guttering. I chose ogee style over round or square - it is about one and a half times the price, but it's really posh...


The renderers prepared the house ready to render the next day. The beading strips are fitted to all the corners to form a proper edge, which makes a really neat corner when it's all rendered.

 
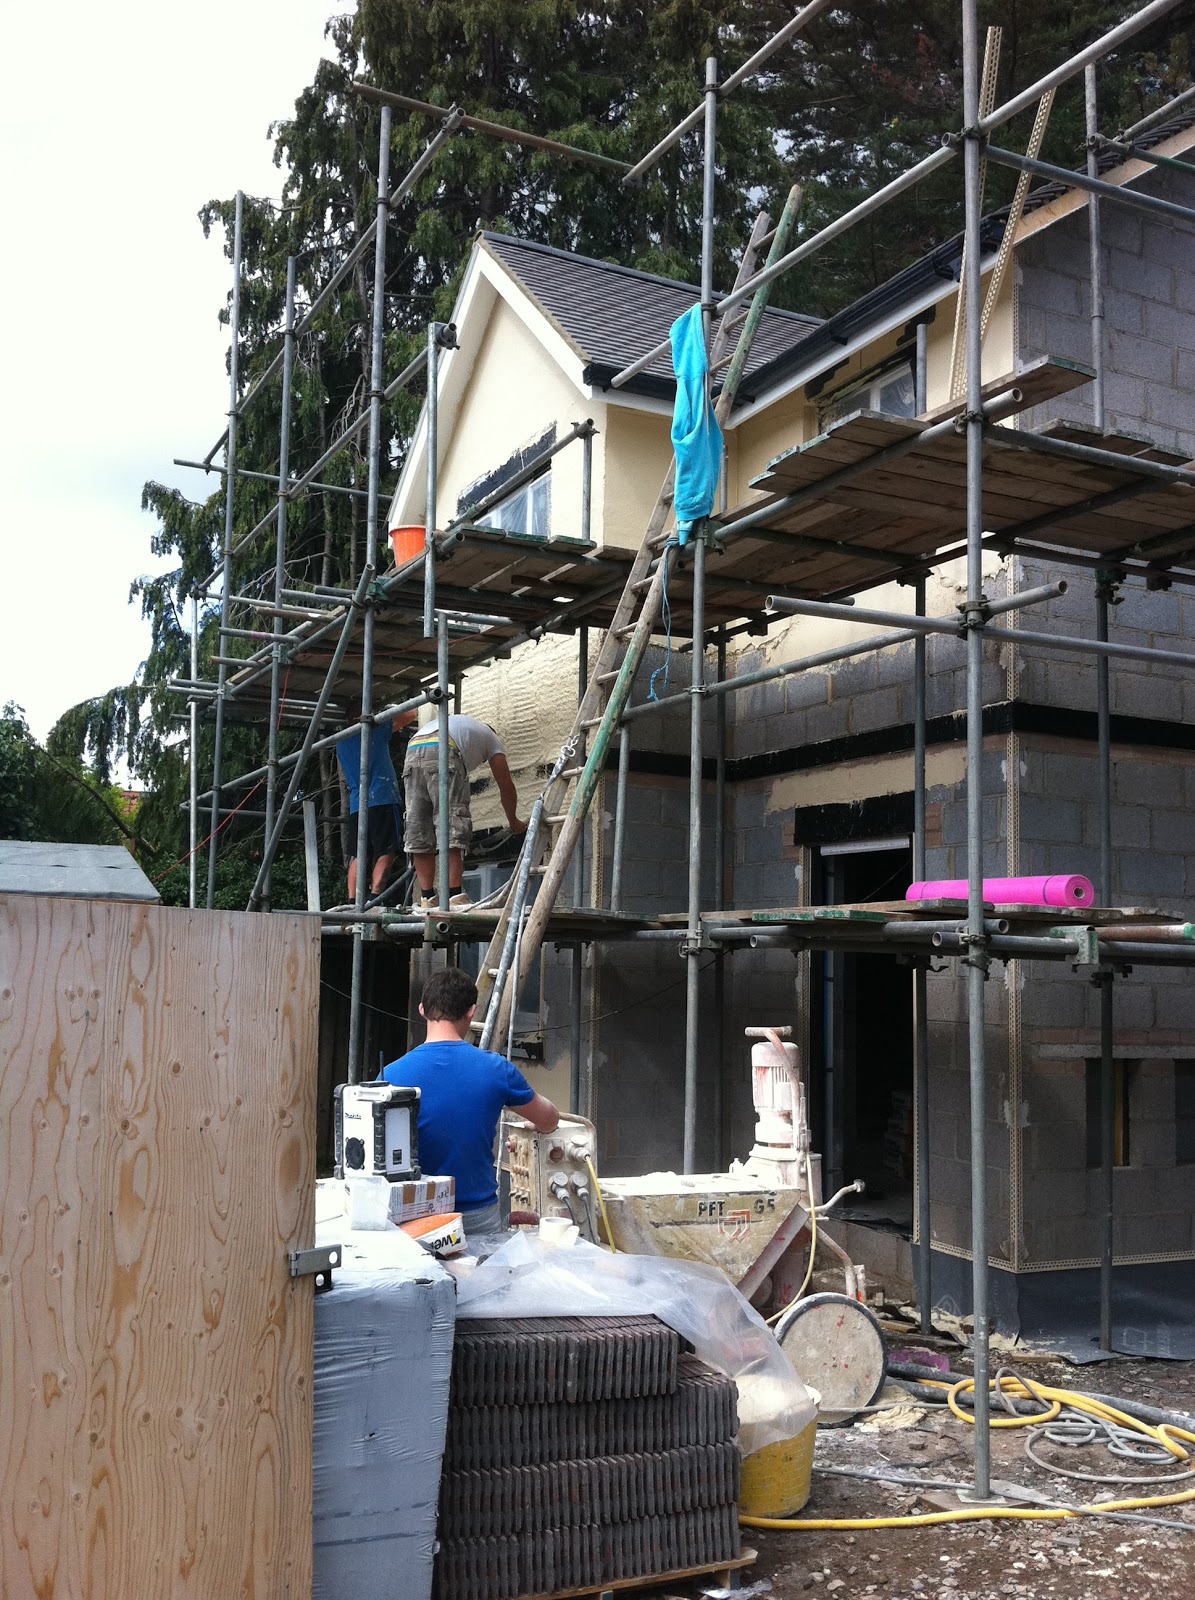
160 x 25kg bags of 'Weber,pral M' Ivory mix render - 4 tons in all. This is a one-coat through-coloured monocouche render, which out-performs traditional sand and cement renders, and shouldn't need painting for 10-15 years. The powder gets poured into a machine which adds water and squirts the sloppy mix out of the end of a hose. The team of renderers on the end of it have to work quickly to get a consistent thickness and smooth it back to a nice finish.


It took the team of 5 just one day to render the whole house. About 4 hours of squirting, followed by a 2 hour lunch break to allow it to dry a bit, then 2 hours of rubbing it back.
These guys normally work on big commercial developments (like Bristol harbourside flats) - not quite sure how we persuaded them to do our little house but I guess sometimes it's just nice to do a one-off. They were recommended by Bob the Builder. Because they work so quickly, they cost the same as if it was hand-applied, which would take a week and a half - but the quality of finish is much better because it's all applied so quickly (no drying lines, and it's applied at high pressure which helps it key  into the concrete blocks really well).
The roll of pink on the scaffolding is a special plastic mesh which they apply to areas like over windows and door heads, where the patch of render will be fairly small and needs the added mesh reinforcement to stop it cracking.


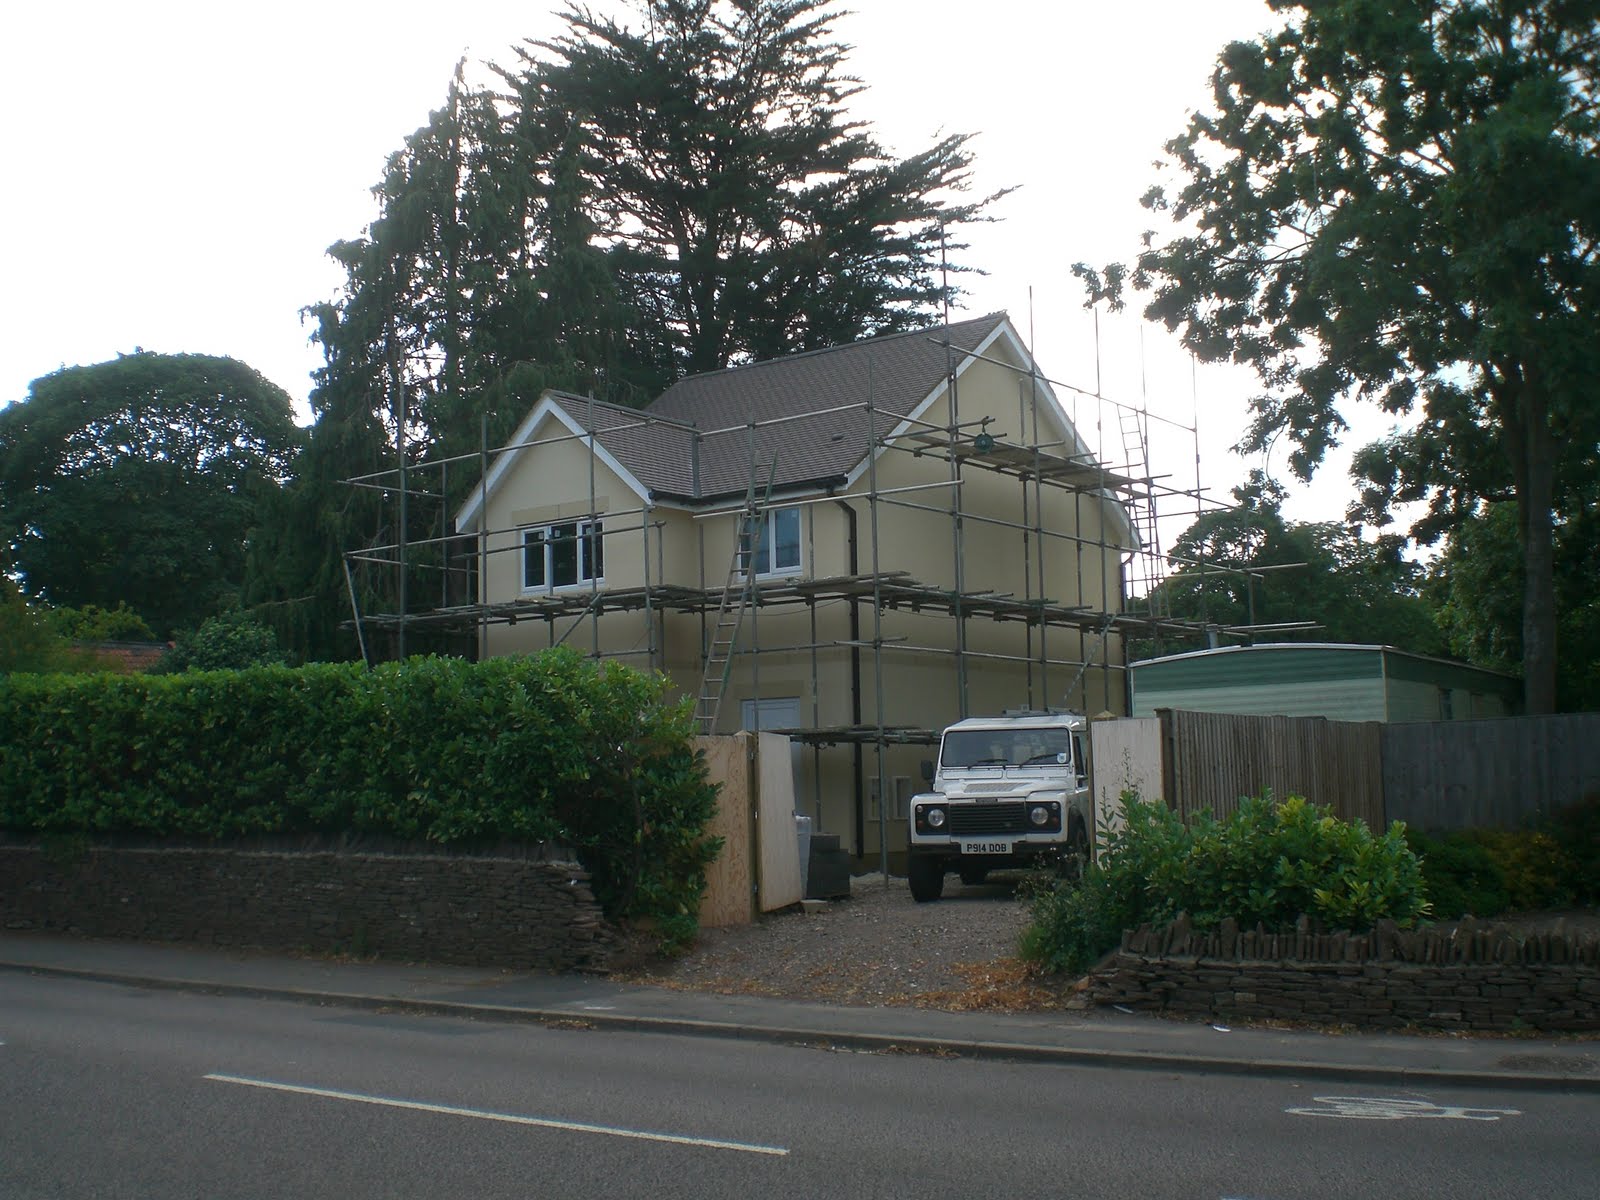
The render is still quite wet at this stage and looks quite dark. As it dries it will lighten up, and should contrast nicely with the decorative stonework around the windows.


In the meantime, Kai is going great guns with the studwork upstairs. It feels strange now that the space has been divided up into rooms.


The outside finished, and a new addition to the plot - Dobby the landrover, which should come in useful...